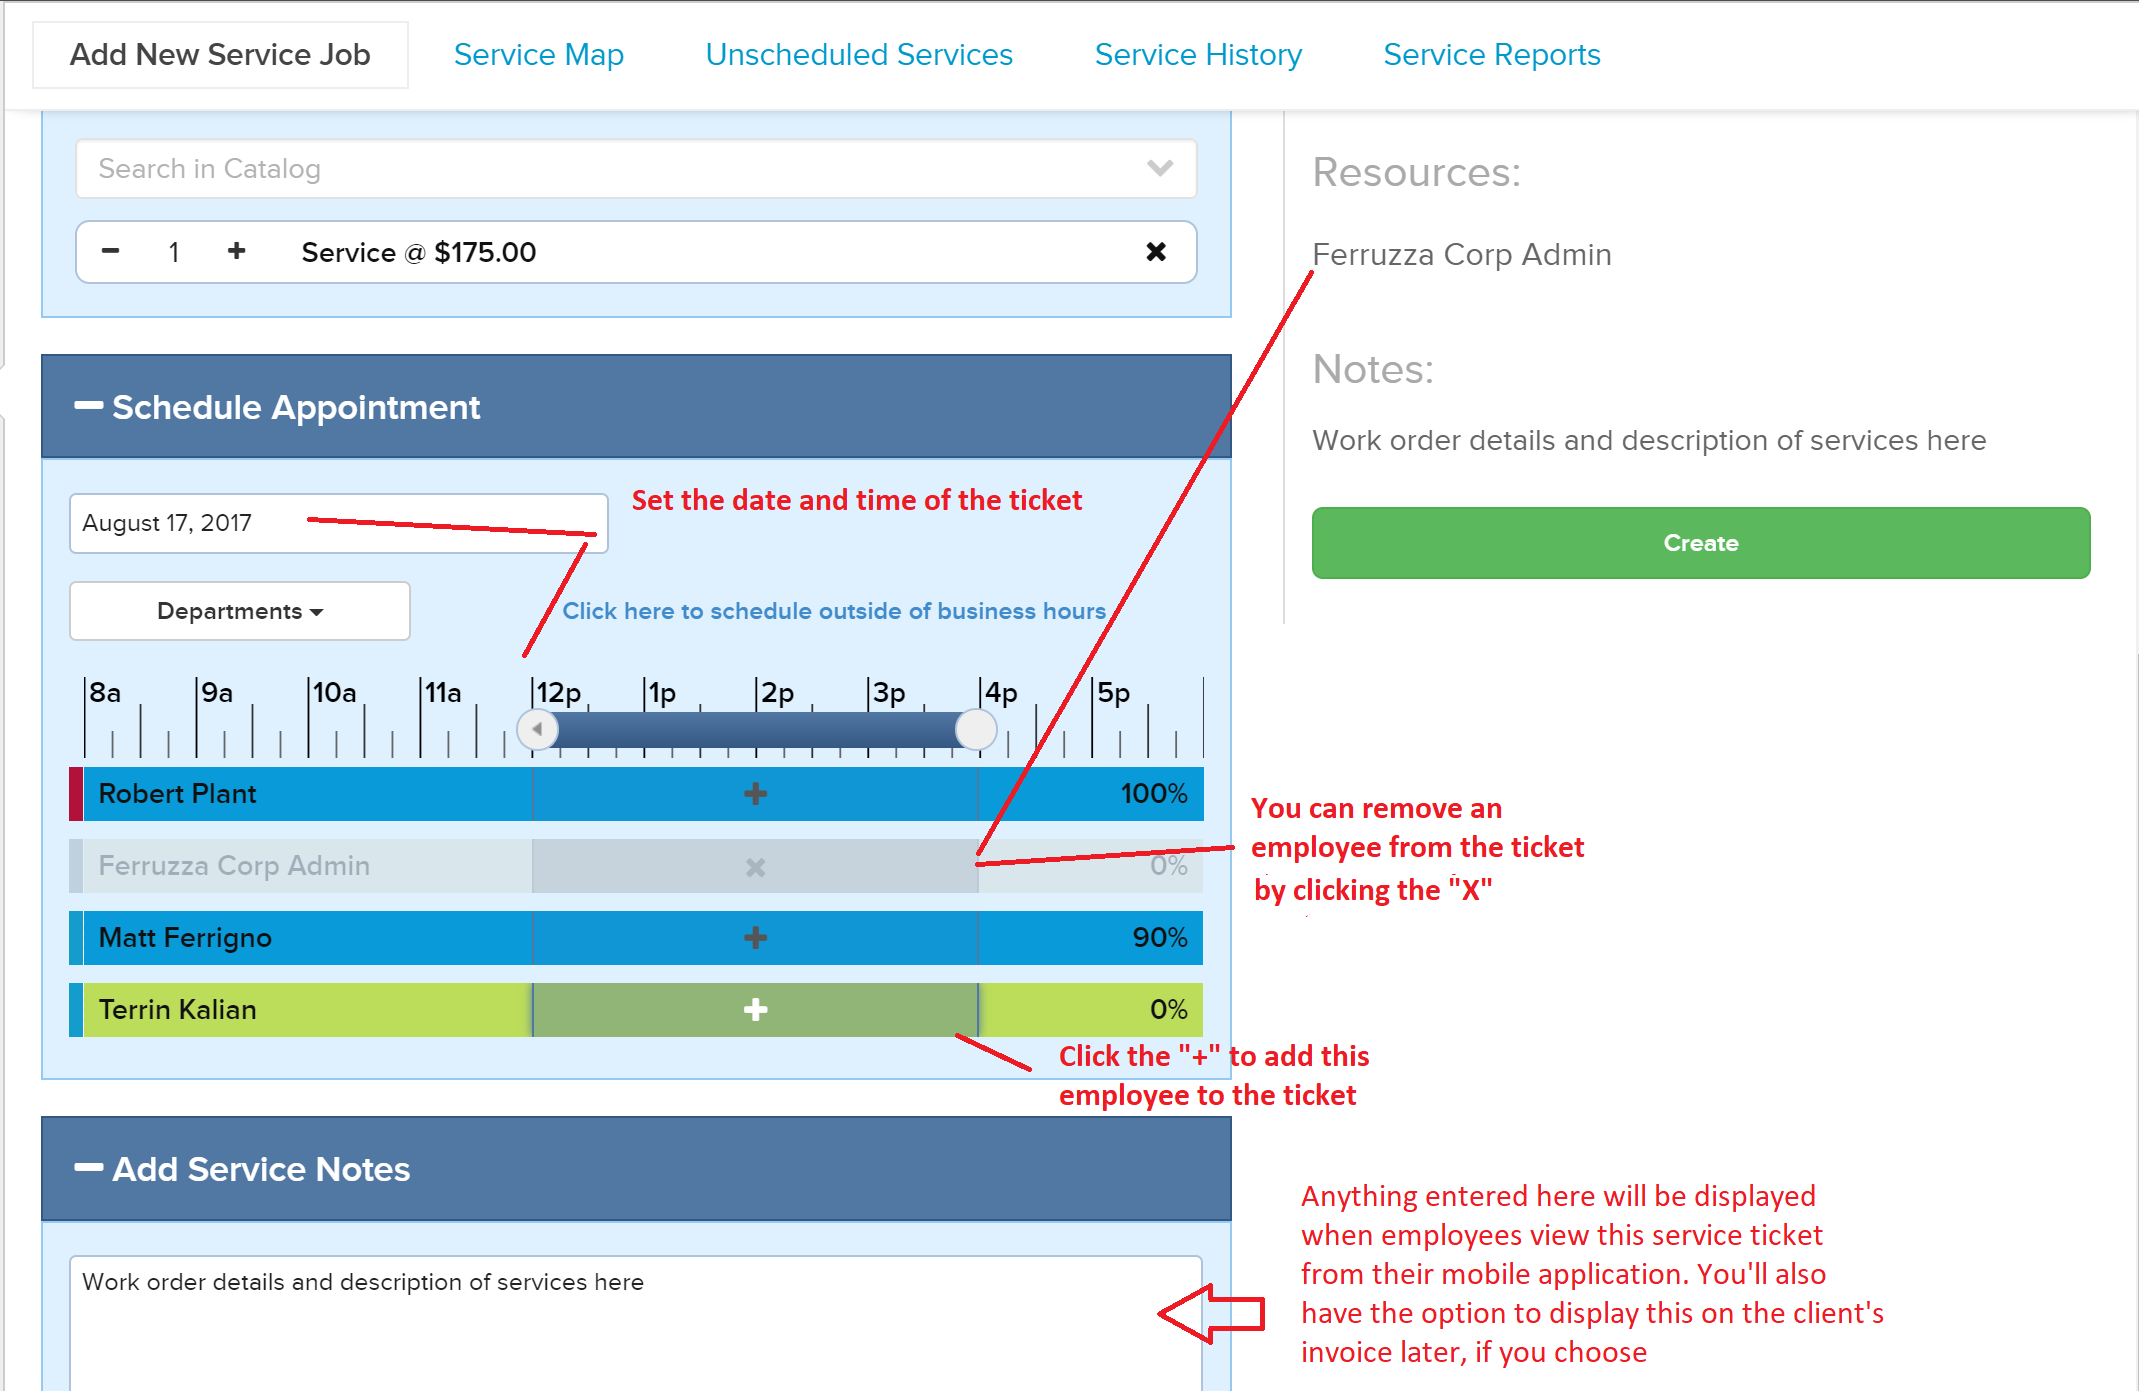
The Service Jobs section of Knowify, was designed for you to track single-day dispatch jobs. Once jobs are setup, they will be displayed on the service map for you to track the status of each:
- Pending = Created, not scheduled
- Scheduled = Job is ready to be worked on; log time, purchases, comments, and document uploads
- Completed= ready to be invoiced, can be marked complete from the office or mobile app
- Invoiced = Final step for the service job; job is closed when invoiced fully
When you are building the service job, you will set up four sections of the job on the left, while you will get a preview of everything you’ve entered on the right hand side.
- Select Client = choose the client and setup the job site address
- Add Services & Materials = This is where you set up how the service job will ultimately be invoiced. You can check off the time and materials box and we will populate the invoice with any approved/billable time entries as well as any purchases pointed at the job (which you can markup on the invoice). Otherwise, you can choose a fixed price service from your catalog and set the price on the right hand side after you’ve selected a product/service.
- Schedule Appointment = Lists all of your employees and shows their availability based on the scheduling for other jobs in Knowify on the date of the service ticket. Seeing 0% (in green) means they are not scheduled on anything else and if they are displayed as blue, it means they are scheduled on another job. The % indicates how much of the day they are scheduled to work on other jobs, and you can hover the mouse over the % to see what the job name they are scheduled on is.
- Service Notes = Any work order details that your employees can view on the app and can be added into the client’s invoice later (optional).


If you have any questions about how Service Tickets are setup, feel free to send an email to support@knowify.com and we’re happy to help!