Knowify is best used as a “moving forward” program for new jobs and projects that were just recently started, but if you have an existing job that you would like to track in Knowify, data can be back-logged so Knowify can be used from this point on to track the cost. This guide will demonstrate some best practices on how to manage this.
First, The most straight-forward way to quickly create an active job in Knowify is by creating the job using the “simple” job-costing style. This will let you build the contract first, then track your costs once it is active.
When creating the contract, being that it has already started and there is no need to bid, you can add a line item with the total contract amount and manually make the job active.
When managing the revenue to date for the job, you can submit an invoice for the total dollar amount collected from the client so far. When creating this invoice, you’ll have the option to not sync it to Quickbooks, to ensure that you don’t have any duplicates.
First, click “Invoice Now”:
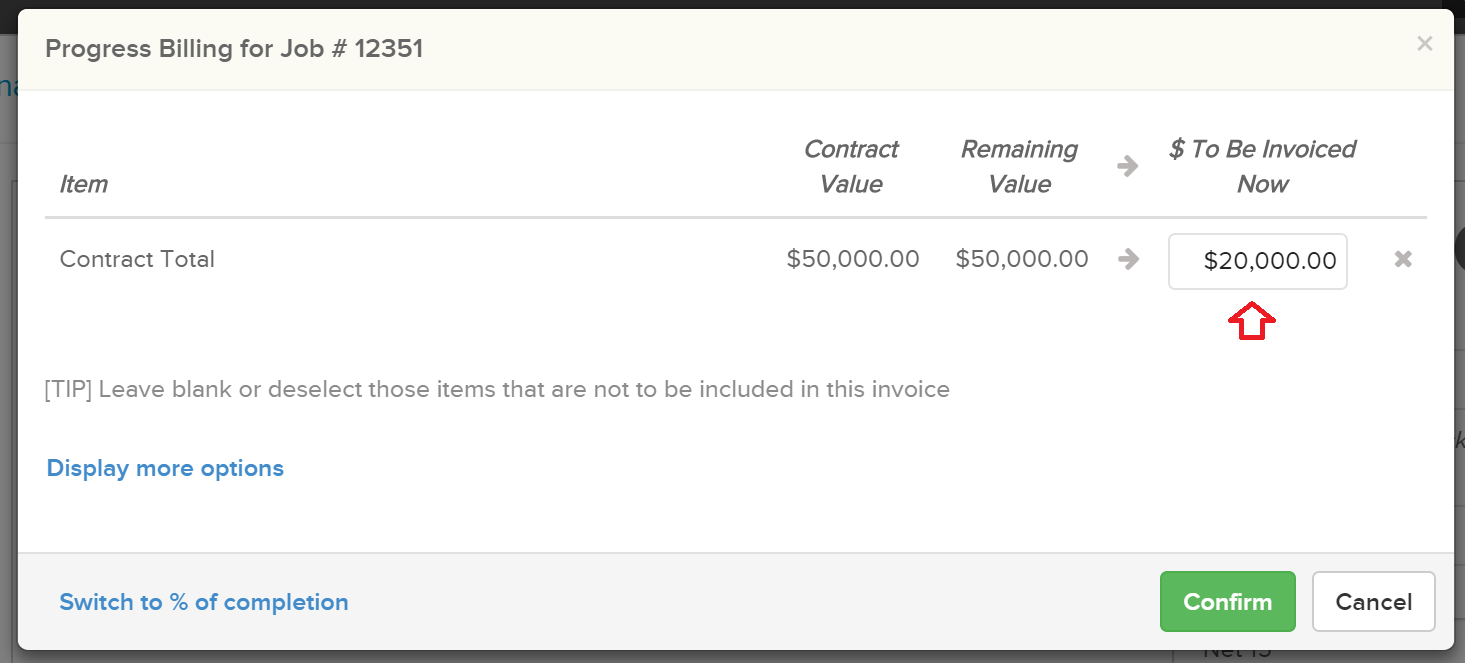
Then, choose the “Switch to $$ Values” button to enter an exact dollar amount:
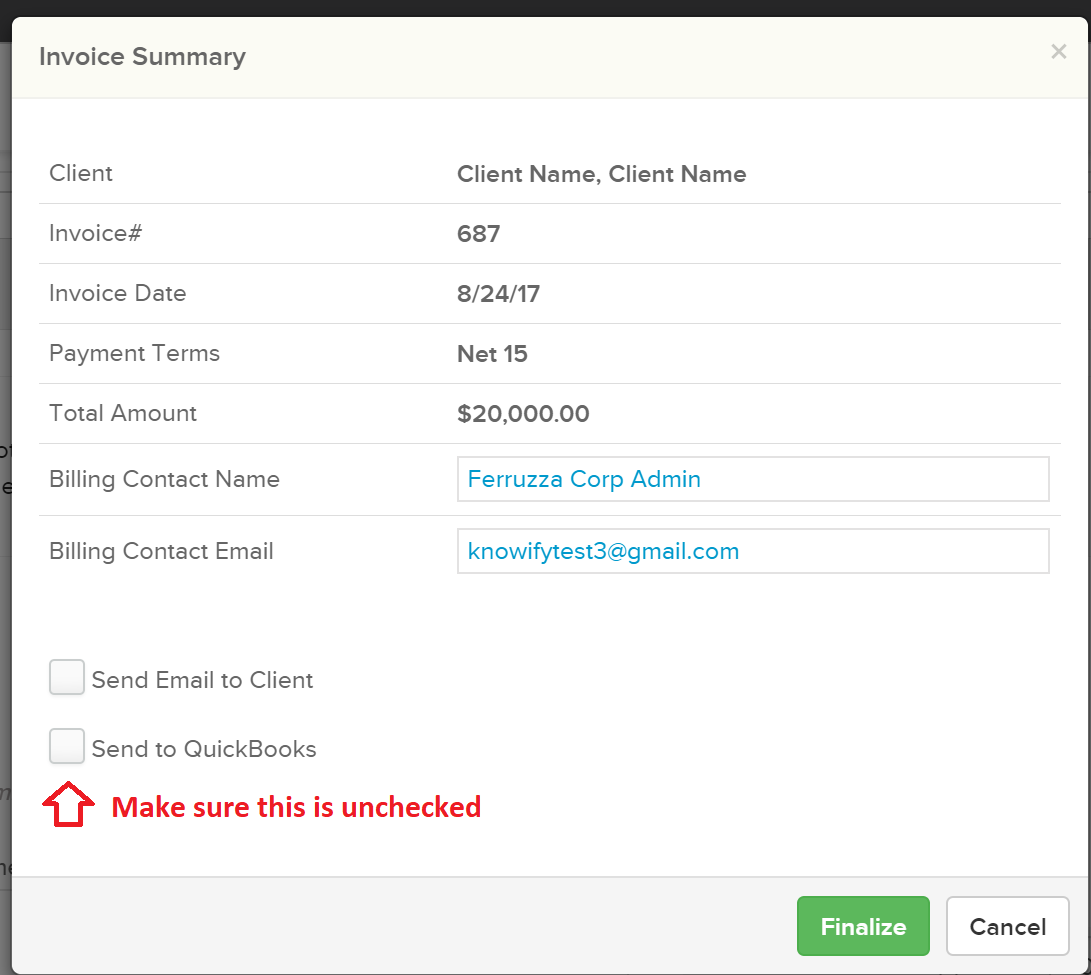
And when you finalize, uncheck the “Send to QuickBooks” option:
This will make sure your revenue is up to date on the project. (you can also record the payments if you’d like, it will not push to QuickBooks if the invoice is not synced)
For the costing side, we would first recommend adding a product/service to your catalog to use as a reference for the total amount expensed for the job thus far. A service named “Job Materials” will do the trick.

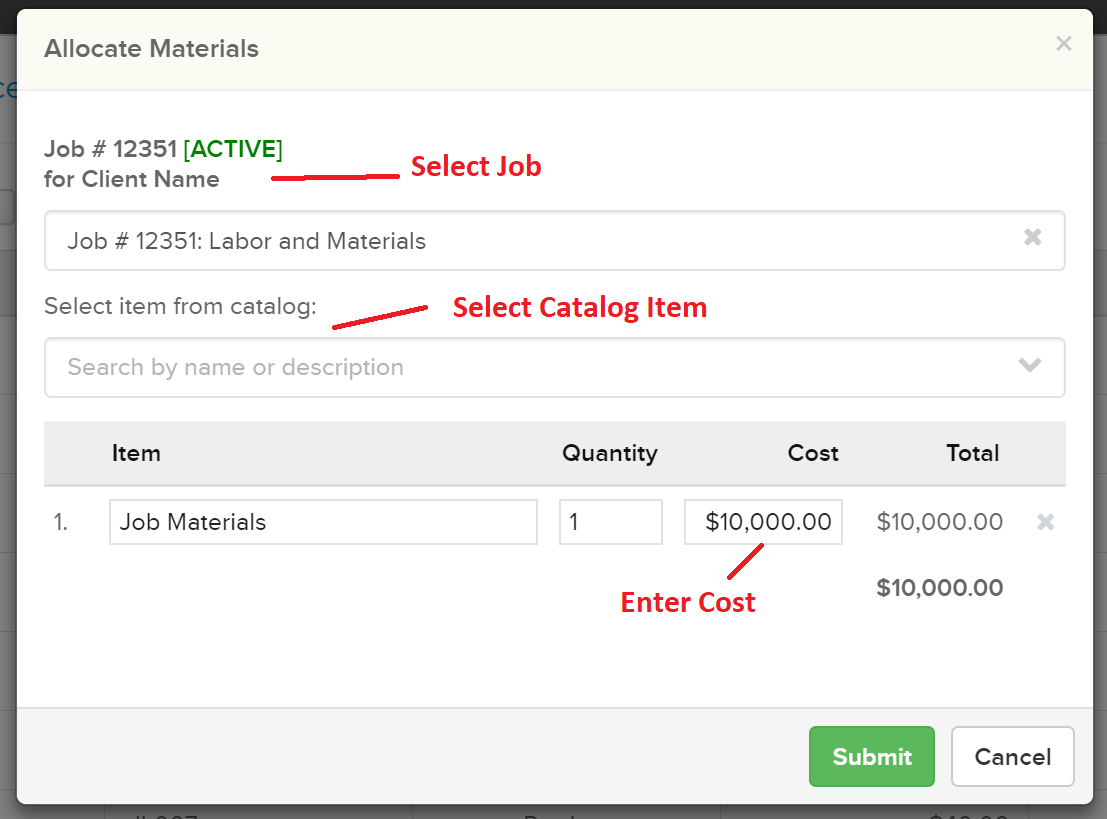
You can then allocate this service to any job and assign a lump sum cost. If you total up the amount of purchases/expenses for the job thus far, this would be the quickest way to get the total material cost to date to show up as part of the job’s cost:


In Knowify, the labor cost is only calculated based on hours submitted against an employee’s hourly rate. With that being said, you will be able to edit any time entry including the total cost of the time entry. Therefore submitting one hour for any employee (you can always create an employee called “labor to date”) towards the job, will let you edit the time entry and change the cost to match the total labor cost to date.
You can start by entering an hour towards the job (Find more info on tracking labor cost here)

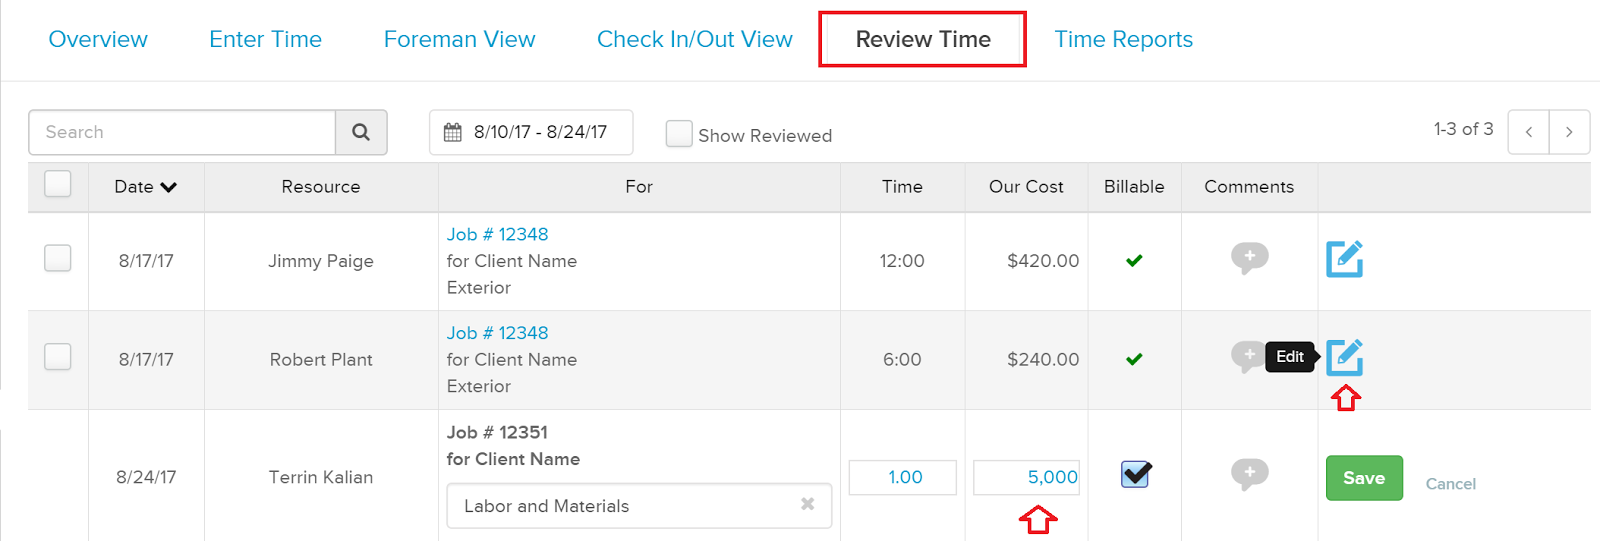
In the Review Time section you can edit the cost to reflect your cost to date. Simply click the edit icon to the right of the time entry then change the number in the cost column:

Once all of this is entered you will have an accurate P&L for the job with the costs categorized accordingly:

You can then continue with this job in the traditional Knowify process! If you have any more questions on this topic, or anything else in Knowify, please e-mail us at support@knowify.com and we’re happy to help.