In this training webinar, Terrin Kalian, Knowify’s Head of Customer Experience, explains how to effectively map Knowify accounts with QuickBooks Online (QBO). The session clarifies how to sync Knowify transactions accurately with QuickBooks, eliminating double data entry and ensuring real-time financial visibility.
Key points covered:
Initial setup: Establishing a seamless initial connection between Knowify and QBO, with automatic data import including clients, vendors, products, and tax rates.
Expense mapping: Setting default expense and payment accounts to ensure transactions accurately categorize and sync correctly from Knowify into QuickBooks.
Income mapping: Using default income services and payment accounts, allowing overrides at the client, job, or line-item level for precise invoicing and tracking.
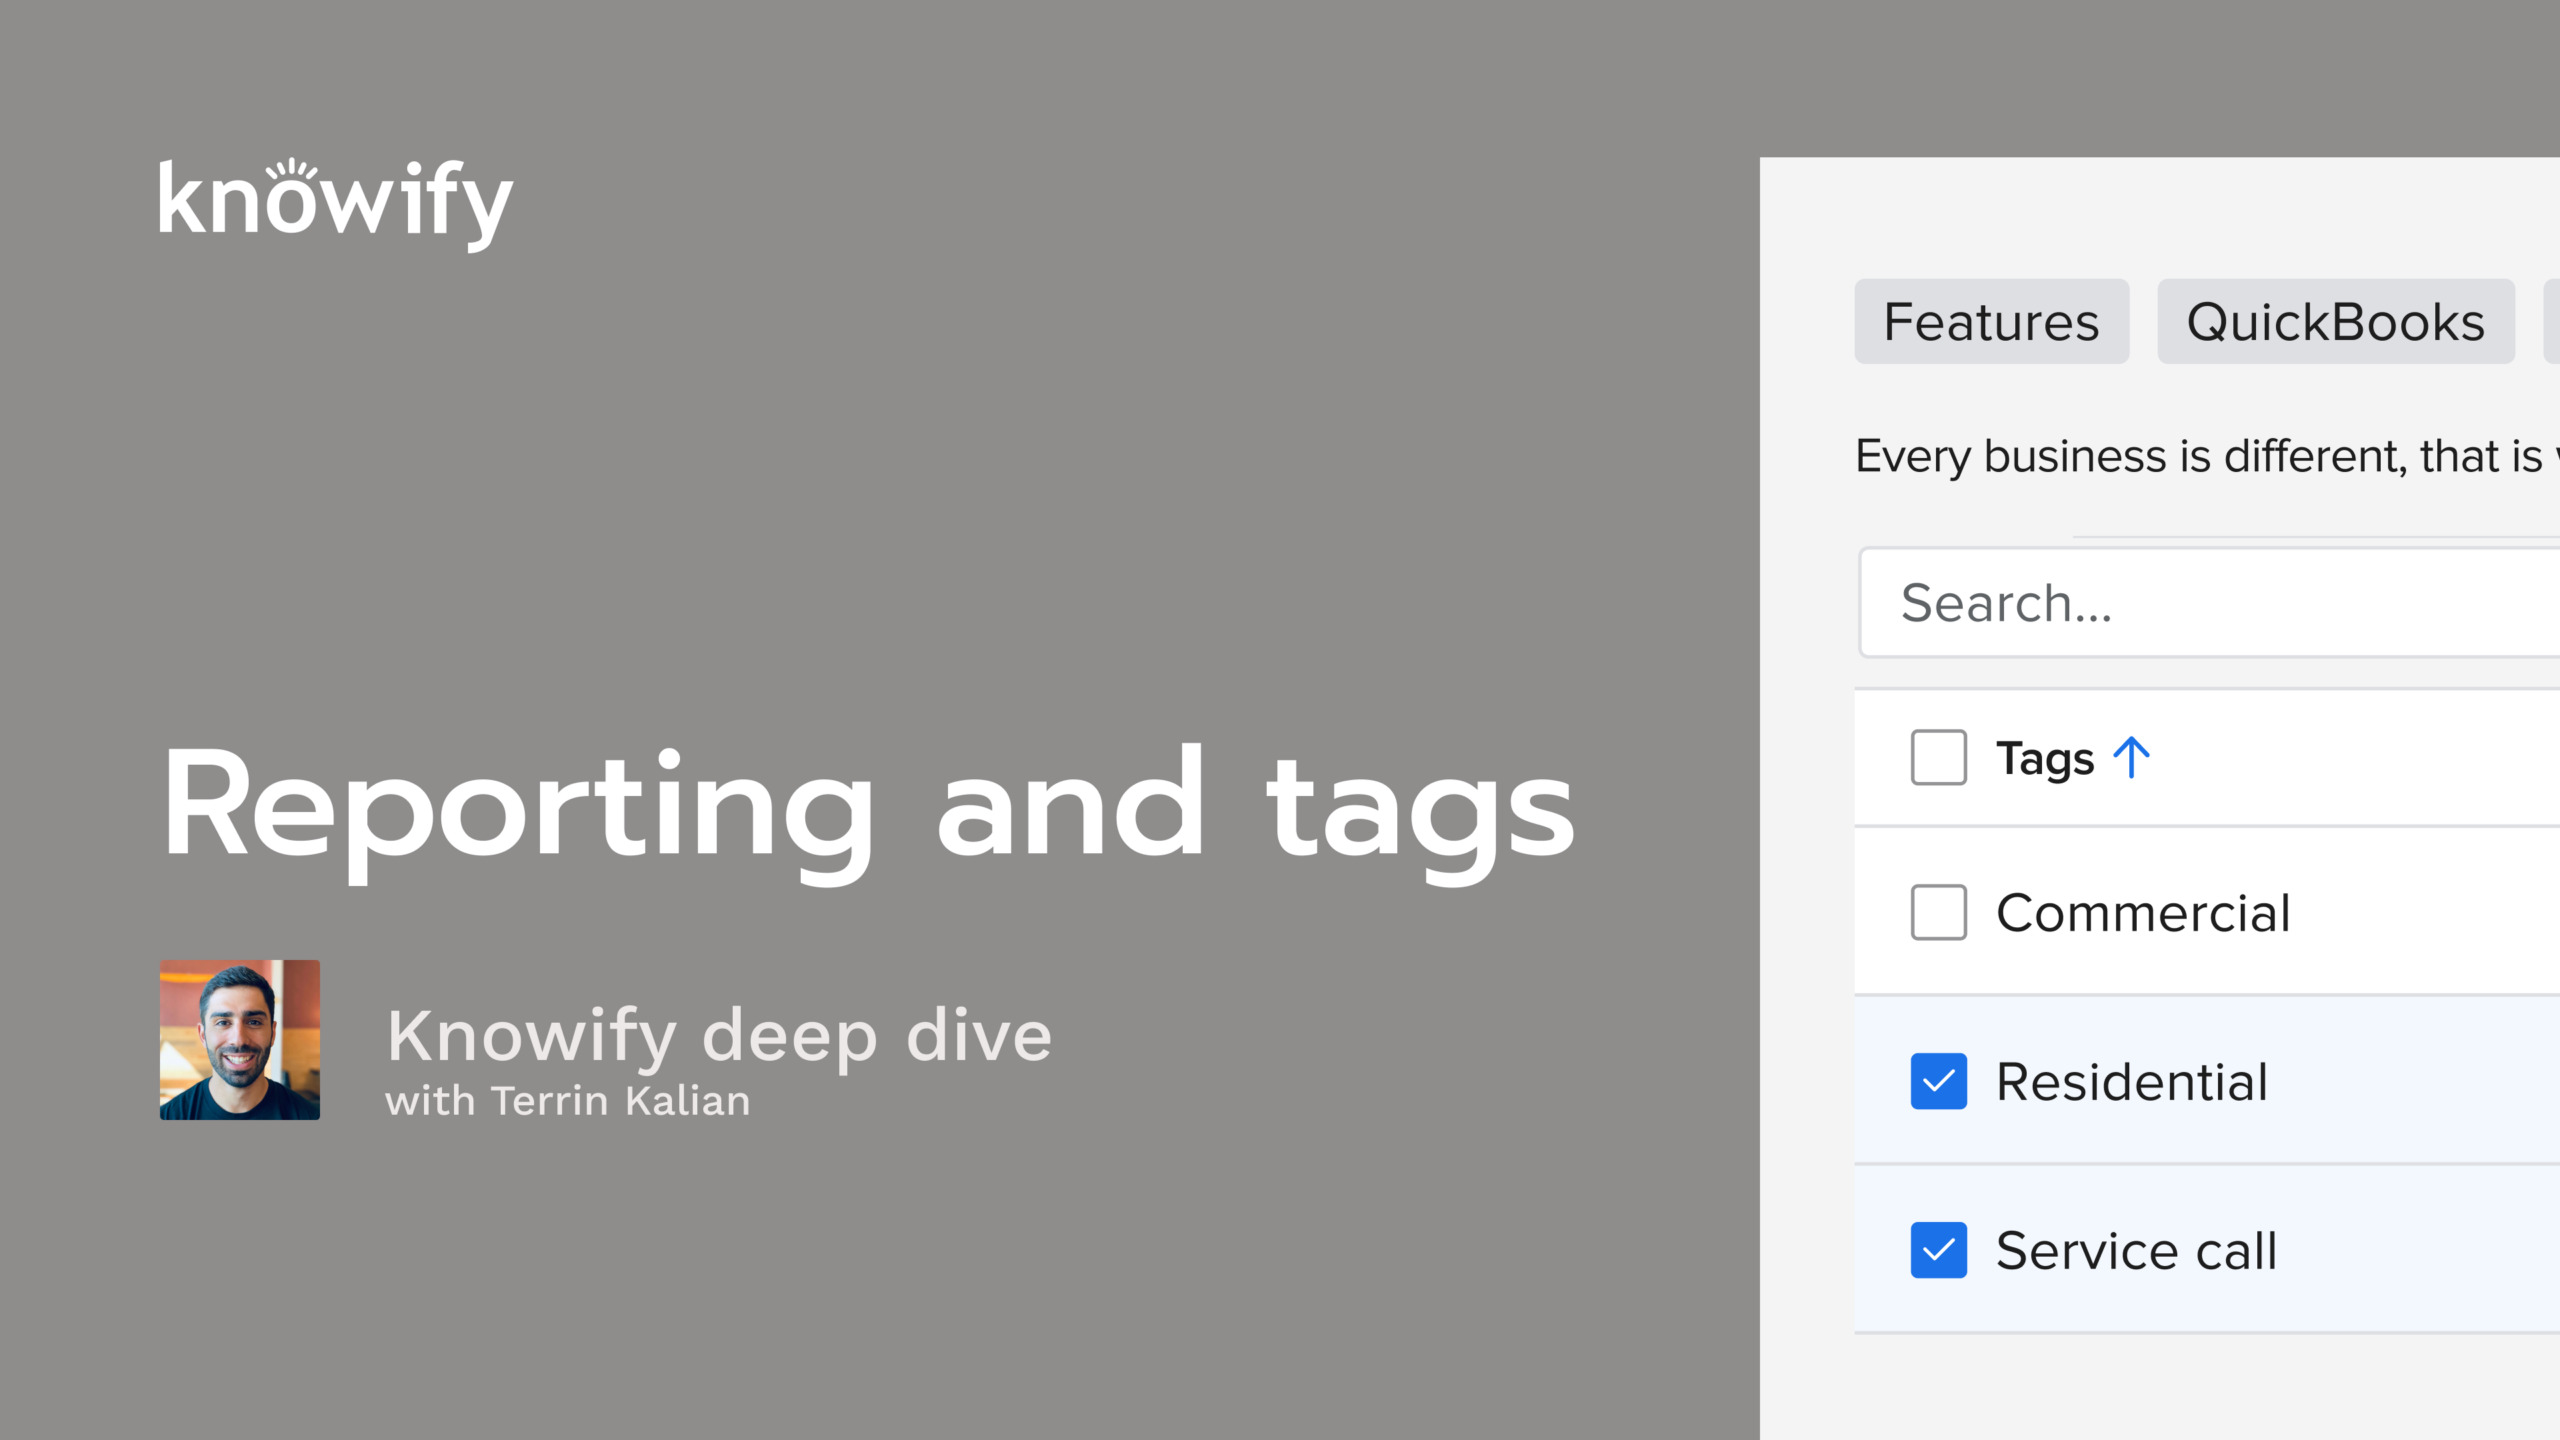
Job defaults: Assigning default services for timesheets, retention accounts, and using tags to simplify class and location assignments for projects.
Catalog defaults: Managing product and service items in Knowify with automatic updates to corresponding QuickBooks accounts to maintain consistency.
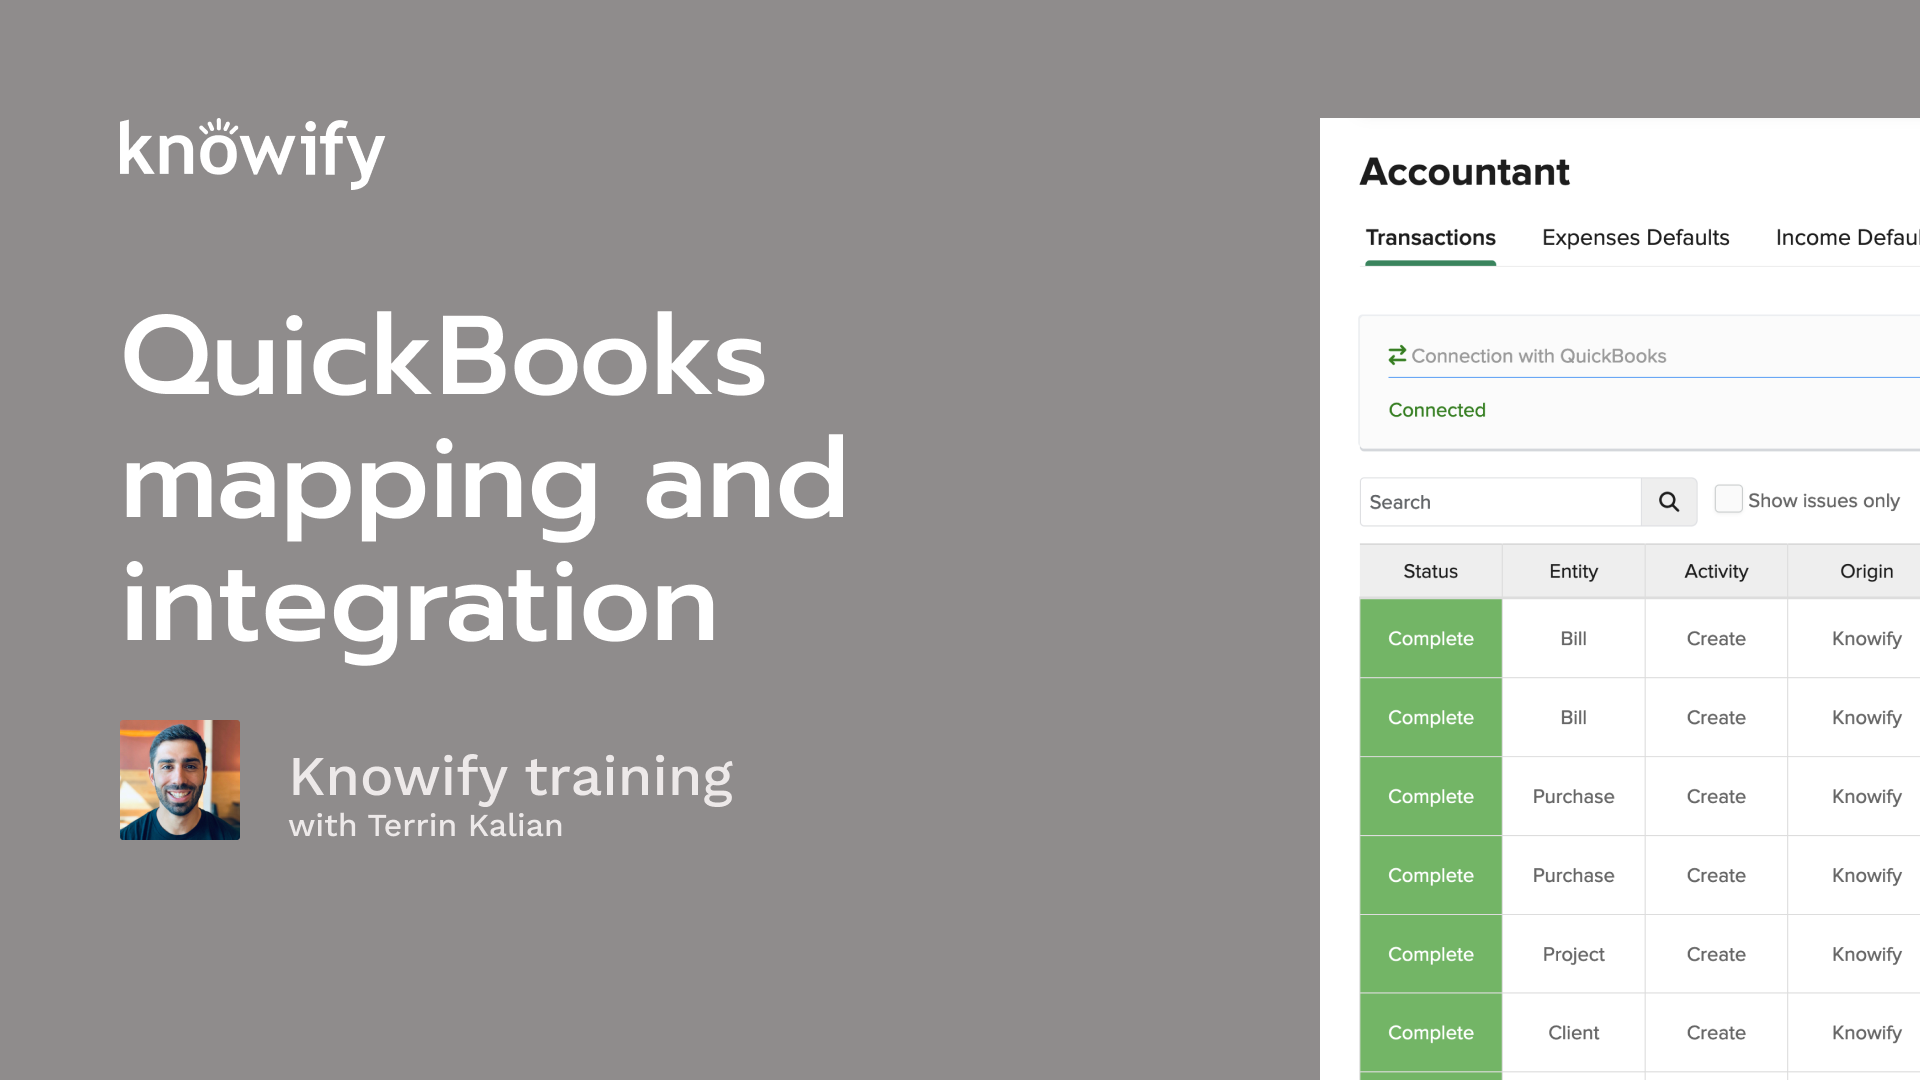
Okay. Welcome in, everyone. Thank you for joining our webinar today. Our topic of this specific session is gonna be on setting up your QuickBooks account and how it maps between, Nullify and QuickBooks. This is one of our more popular topics, I think, for anyone who's using QuickBooks for their accounting and connecting it to Notify. It's nice to make sure that it's set up to push everything into the right spot in QuickBooks. We wanna always make sure that when no one things data to QuickBooks, it's not just dumping it in and then making it someone else's problem. We want it to be nice and detailed and accurate so that we can get some good accounting and, reporting based off of these numbers. For no one who's unfamiliar with these sessions, these deep dives are really just an opportunity for me to spend a little bit more time, on a specific topic. So instead of just overall use of Noify covered in every session, we do really try to focus on this one specific concept. If this is the first webinar you've attended and you're not familiar with Noify, some of this might be a little bit trickier to follow. But we do record all of these, and we could send you all the recordings of past ones as well to help you get started. But all that being said, I'll go ahead and get us kicked off. And if you're unfamiliar with me, my name is Terren. I've been working at Noify since two thousand and fifteen, so pretty decent amount of time here so far. And my job at Noify is just to make sure that you guys are happy with us to the best of my abilities. So whether that's regarding how the product functions or how you interact with our team or as it pertains to these webinars, just making sure that you know how to get the most out of your Noify account. That's really where I specialize. So there's a chance we've worked together in the past. If so, good to see you. And, if not, hopefully, we can connect at some point. I can help you out with Notify. To quickly cover the agenda, what we're gonna be discussing here today, I always start with a slide deck, and I'll be covering things like how to connect Noify to QuickBooks, how to do your mapping, things like that via slides. But I'm gonna spend as much time as I can via the demonstration aspect of, nullify here so we could see all this happen in real time. If you have questions during the webinar, you can use the q and a, field in Zoom. Just throw in any questions. I have, my associate, Vin, will answer a lot of the questions, through the webinar itself. But then anything that requires longer form, responses, I'll, follow-up at the end of the session and answer them. And I've got to take out by product updates, but I don't really have too much to show you today. Actually, I do have a couple things I can show if we have some time at the end, so I'll circle back there. But all that being said, I would like to start with just the initial connection of null five to QuickBooks. And I think a lot of the reason I like to start with this is it can be intimidating, especially if you have years worth of data in your QuickBooks account, connecting it to another application. And the big reason it can be scary is because when you connect, you don't wanna mess up any of your accounting data. So what I always like to kinda clarify when we first start, and connect notified QuickBooks, we will pull a lot of your QuickBooks information into Noify. So that would be, your clients and vendors lists, your products and services, your, chart of accounts, tax rates, employees, things like that. We pull all of this in so that that you can start using Notify. You can create a job, and we have the client already in there. I can create a purchase. I already have the vendor in there. I can start budgeting. I have my items, etcetera. But we don't push anything back to QuickBooks on this initial connection. So if you're kind of on the fence about whether or not you wanna connect because you're worried about messing up data in QuickBooks, it never should be a concern. You can just go ahead, connect your nullify to QuickBooks, grab all of that data, and you could start creating jobs, generating data. And for the most part, we'll be actually be prompting you. Hey. Is this something you wanna sync to QuickBooks to make sure that we're not sending over anything that you don't want? And a lot of these things, if it doesn't prompt, do you wanna sync? It's because they have to be bidirectional by nature. So, this initial connection, when we talk about things like clients and vendors, we try our best to have a one to one list. So I have a new client in Notify, that syncs into QuickBooks. If I have new client in QuickBooks, it comes to Notify. Then if I edit that client in either system, we wanna make sure that edit goes across as well. So I don't have, someone in QuickBooks updating all of my client contact info there, and then Noify has the out of date info. We try to make sure that's as live of a connection back and forth as we possibly can. Some things don't, necessarily live in Noify the same way. So, yes, I have my chart of accounts from QuickBooks and Noify, but that mainly exists for the sake of the mapping that I, I'm gonna be covering through this session. So it's not that Noify has its own chart of accounts that connects to the QuickBooks chart like it does like we do with our clients or our products. We're just pulling in the QuickBooks chart of accounts. So I could say this type of transaction in Noify goes to this account in QuickBooks, etcetera, etcetera. And that's a good segue to the concept of actually mapping things between Notify and QuickBooks. So there's gonna be a tiered based mapping system with just about everything that syncs between Notify and our, QuickBooks account. And the idea is that we start at the highest level where I could say, if all else fails, use this expense account. And that's what you'll see. And, again, we'll cover this in the demo, but that's our default expense account as the company default. We need to set up this mapping because QuickBooks needs some of this information in order to generate different transactions in order to accept the sync. So we set up these defaults. So it's basically, hey. If all else fails, if I don't know anything else, what should we assume is the expense account when this expense when this bill syncs to QuickBooks? And that's what we're setting up with our mapping here. But to get more specific than just the company overall, everything goes to this account. We can also set a default account per each vendor. So I could say, yeah, everything goes to uncategorized expense unless I buy it from Home Depot, in which case it goes to job materials. This way we can be more granular, and we could say, well, yeah, we have an hour fallback, but I know that every time it's Home Depot's job materials, this actually takes precedence. We even have a more granular, level of this where I could actually, on each line of an expense, send expense account, and I'll cover that in the slide a little bit further down the line and also in our demo. But that way, I don't have to say everything with Home Depot goes to job materials. I could say, well, if I buy this from Home Depot, it's job materials. If I buy this, then it's actually subcontractor services or whatever the other, equipment rental, whatever it's gonna be. And that's really how the mapping is gonna work. We're gonna be able to specify what specific accounts things go to, based off of the fallback and then also the individual vendor. Aside from the expense account for the sake of categorization and reporting, We can also set default payment accounts. So less about, is this a job material and more, how are we paying for this? What bank account does it come from? Are we paying in cash? What is the credit card used? That's where, the mapping can get even more specific and granular, where, again, it can be set at the overall level. Hey. If you don't know anything else, assume it comes from our company track checking. But you can say, well, if it's Home Depot, it uses our Home Depot credit card. And so, again, the more that we get detailed in our mapping, the less manual work it takes, to make sure everything ends up, in the correct place when it sinks in. The income side of things works pretty similar to expenses. I think the big difference with income is that on lines of an invoice in QuickBooks, we don't actually select an income account the same way that we can select an expense account for each, expense. We select items from our products and services list, or as know if I will call it the catalog. So this means, things like, I have a service called services, called sales, called plumbing services, whatever it's gonna be. So when I map, I'm not just saying, oh, it's for my, sales of product income account. I'm saying what this fallback service is. Now, again, that's a QuickBooks requirement because if you're creating an invoice in QuickBooks, ignoring that Noify exists, they're gonna request a default, or they're gonna request an item. Since Noify doesn't request an item, we need to have this default that says, hey. In the event that the user did not specify an item, what item do you want us to use? And that's how we'll set up this mapping to make sure that everything can sync, as seamlessly as possible. Now for people who are pretty granular with their income, accounts, you can connect those income accounts to the services, which will connect, which will, discuss a little bit more, when we get to our catalog defaults. But the general idea is that I could say, here's the fallback on every item. Then I could say, well, here's the fallback, income service for all invoices unless it's Amy's sanctuary, the client, in which case here's the more, relevant, item, unless it's this job of Amy's sanctuary. And then on each line of each job, I could say, here's the service that's being provided so I can map my invoices accordingly. So, again, we always start high level. Here is the income service I want you to use, but then we can really break it down on this specific line of this specific job. This is how I want you to sync the invoice. And then, income defaults also allow us to set default payment accounts for collected payments from clients. So similarly to the idea of, hey. Whenever I pay Home Depot, goes from the Home Depot credit card. I could say, well, when Amy's sanctuary pays me, we actually go to our savings account directly instead of the checking or something like that. So when we are recording payments in Noify, it knows where to adjust the account in QuickBooks. You also have the ability in our income default in our client mapping to set default tax code for each client. This really it's not necessary, but it does help if you have clients with special tax needs so that it can automatically fill that in for you, and you don't have to, manually, update it every time you create a contract. I will say, and I'll cover this a little bit more via demo, the income defaults should be always more of a fallback where this is something that you should be mapping on a contract by contract level to get your good, reporting. But, again, we'll show you how, more about how this goes through the webinar. Then we also have inside our mapping what we call job defaults, and this is gonna be some miscellaneous other fields, relevant to how Noify syncs with QuickBooks. The first one is gonna be for time entries. So, when we sync time from Noify to QuickBooks, if you need to sync time, QuickBooks will require a service item on each time entry. This is our way of saying, here's the fallback. Again, it's always a default. You can get more granular when you're actually, setting up projects, when they track time to this phase, use this service. But since it's not required in nullify to have a service, but it is required in QuickBooks, we do need to set up this default as our fallback to make sure the time does, always sync. The same goes for if you have nullifies deposits feature enabled. We can say, here is the service item for the deposit line of the deposit invoice that's generated. Since that's not set up as part of the contract itself, we don't actually have a line for deposit. This is where we would map that again because it's not, something that you could set while actively building out these, jobs in nullify. Then also for people who are syncing retainage to QuickBooks, for people who are using, AIA style invoicing, and that would obviously be people, in the States. This can control the account that is used on the journal entries generated in QuickBooks. So if you sync a retainage journal entry in, what account are we adding the retainage to so we can then remove it from that account when we balance out an invoice retainage later on? Then we also have the ability at a job level to set a default class and location for each job. So if you use classes or, and or locations, this is where you can specify which one to use on all transactions affiliated with that job. So this is expenses, bills, invoices, time, everything we can sync affiliated with that job. To the best of our ability, we'll have the relevant class and location. For people using IES, this is substituted with dimensions. So they'll actually, automatically set up a class dimension for you. You can set up a location one, but that way you can actually map, the classes, and locations according to what job that you're selecting. To make it easier to get things into these class and location fields so I don't have to always add a job and come back to the mapping, you also also have the ability to set the default class and location per, different tags that you have in your account. So that way, when I set up a project, I could say this is commercial tag in nullify, and then we connect that to the commercial class in QuickBooks so that it automatically goes back to this other section. Whoop. We'll hook up there. It goes back to this, other section and sets the class and location accordingly. Then catalog default is where we get into the idea of, what is the income account affiliated with my different items, my products and services in QuickBooks? And then also, what is the expense account? So if I can be more specific on a transaction by transaction basis. So if I have something in my catalog called one by six lumber, When I go to buy something from Home Depot, if the default for Home Depot is job materials, but the default for one by six lumber is miscellaneous lumber cost expense account, we know to then use that account instead of whatever the default is for the vendor. So, again, this is where we can really start getting granular. The catalog defaults also help us map the default income and expense account for new items that I create in nullify. So, again, our catalog of products and services is connected to QuickBooks' products and services. Since we don't have our own chart of accounts, but QuickBooks does require a default, income or expense account affiliated with different items, This is your way of saying, hey. When I create a new item in nullify, use these income and expense accounts to ensure that it does sync to QuickBooks, and we can, have everything moving back and forth smoothly from there. But, again, I always think the best way to learn these things is by looking at them. So I'm gonna pull up my Notify account and, jump right in on a lot of this stuff that we covered. The first thing I wanna do is go to my admin section, and I'm gonna go to this tab called QuickBooks. And I can see it's connected. I'm gonna go ahead and disconnect my QuickBooks account so we can pretend we're starting from scratch. This is where it says connect to QuickBooks, and I think the best practice is to first make sure you're logged in to the correct QuickBooks account. If you have access to multiple, double check that company name, double check some of the data. Hey. Let me look at the clients in this account. Make sure this looks correct to me. Anyway, now I know this is the account I wanna connect to. Beautiful. I'll go ahead and hit connect QuickBooks. Your browser knows to look at what account is, connected here. Not gonna ask me to set up payments. Sorry. Gonna have to be a quick little pause and return to this. You know, I make the mistake of doing all of my testing in my account that I use for these webinars. So it's pretty common for me to, run into silly things like this just because I probably shouldn't even be using this, account in general for my webinars or for my testing. I could do kinda like my webinars. Okay. Let's start doing this again. So I'm gonna go back to my QuickBooks account or QuickBooks, page, connect. Same thing with payroll now. Let's see if I could just note things through it. No. I didn't think so. Sorry. Bear with me again. Hopefully, this doesn't cut too much into our time. Okay. So, hey. Do you wanna connect Novi to your QuickBooks? Of course, I do. Connect. And then I should get a success message. Your connection is up and running, and that just means that we can start syncing things back and forth. Now since my account was already connected, it's gonna work a little bit differently. It's not gonna do an initial pull or anything. It already knows to connect everything, that already exists. But now I'm connected, and I can start setting up my mapping. That's where we have this QuickBooks logo at the top of the screen. I'll click here, and it pulls me into this transactions page. This is kind of like an audit log where I could see different things that have moved back and forth between Notify and QuickBooks. So status, pretty self explanatory, complete versus error entity. What did we sync? Project item, bill, invoice. The activity is saying what happened. Was it created, updated, or deleted? Origin, is this something that was created in QuickBooks or updated in QuickBooks, or did it happen in Noify? Date and time and then the transaction itself. We do have the ability to direct link to different transactions from here. So I could see project create nullify three three one. And if I hit on hit complete, it'll take me to three three one in QuickBooks. If you ever need to say, like, well, what did you actually create? Let me see it in real time. But now I wanna get into the mapping here. So, I have my default expense account, which is uncategorized expense and my default payment account, which is business checking. If I go look at the different, vendors below, anywhere that this is blank is where these default expensive payment accounts are gonna come into play. So Ace Hardware is a good example here. I could say Ace Hardware, create new purchase, and I'm gonna start with just a cash expense. I'm not gonna use any specific catalog item. I'm just gonna say miscellaneous job costs for a hundred dollars. And if I'd like, I can call out a specific job, and I'll go ahead and submit this. Now because the way my mapping is set up, this has synced to QuickBooks. I'm gonna hit the check, view QuickBooks. I can see the category is uncategorized expense, and the payment account is set to business checking. So just to review that back in my mapping, under expenses defaults, Ace Hardware has nothing, so it goes to uncategorized expense and business checking. But now let's look at ABC Supply. This has supplies and materials set as its expense account, and I'm gonna say cash as my default payment account. Then I'm gonna go through that same exact process. I'm gonna create a purchase, cash, ABC supply, miscellaneous job materials, Really try our best to not do anything differently at all. Submit this. Now NoFi knows that there is a specific account for APC supply for both, expense account and payment. So when I view on QuickBooks, it's gonna map differently. Category goes to supplies and materials. Payment comes from cash. And that's really how the expense side of mapping is gonna work. The same rules apply for bills. The difference is with bills, the payment account only comes into play when I record a payment. But the idea is that in an ideal world, this uncategorized expense never really needs to be used because we're more specific at the vendor level. A lot of times people ask, what should they have as the default? A lot of people don't like uncategorized, and I think that's very okay. The way I see it is there's two schools of thought. You can either use something generic like uncategorized, or you can even build something that says, like, not specified by Noify or anything like that so that you could then run a report in QuickBooks to say, show me everything Noify synced that didn't have anything more specific mapped to it. But if you don't wanna ever have that and you just need something a little bit more generic, if there's an account that you use almost all of the time with few exceptions, you can have this just be something like supplies and materials, and then everything is gonna default there unless something else is specified. So you have that power as well, which might end up saving time in the long run. If I go to my income defaults now, I'll get to catalog in a minute, but this is where you could see my default income service, again, isn't actually going to be a income account. This is where I could say our default is services, and that's our fallback whenever we know nothing else. Then I can also map at the client level. So, yeah, it's services unless it's Boston University data center, in which case you use supplies and materials. So I could say for them, we do a lot of can lead installation. Here's my default, tax code, payment account. Again, all very similar. But I'm gonna create a new job. I'll use a one construction as my example here because I like a blank default for the sake. I'm gonna add a new job, choose this customer, and I'm gonna quickly just put this all together. Now when I'm creating a job, I can always write whatever I want because nullify doesn't require services or products on lines of contracts, which means I can always say anything new to right in here for a thousand dollars. But in the interest of getting more detailed mapping, I can also choose items from here where I could say use demolition, and this little icon is gonna be your friend. This is gonna be to what tells you something is mapped here beyond just, a description. So now Nullify knows to use the demolition item for mapping between Nullify and QuickBooks. I'll do a thousand dollars here too. And to specify, you do need to select the item. So, for example, if I say drywall, this is an item in my catalog. But if I don't select it, you see I don't get that icon. And so it's not actually going to, when I create my invoice, use that drywall item that's from my catalog. Now once this is active, we still have the ability to make adjustments to these. So that drywall one, I can hit this gear, associate to catalog item, drywall. Bingo. I can see demolition's already mapped. If I need to update it, I have that option. And then anything new to write in here, I'm gonna leave that as is. Now when I invoice, I'm gonna take a little bit out of each line. I'll go ahead and finalize. We're gonna send this invoice to QuickBooks. I'll view in QuickBooks. And I'll be able to see when I chose nothing, it went to services. When I chose demo, it went to demo. When I chose drywall, went to drywall. If I need to adjust that for future invoices, I have that option. I can always just, go back to the contract and make adjustments here. But, essentially, what happens is whenever it's blank, it's gonna look to our income defaults mapping. It's gonna say what was my job over here? Three thirty two. What's the default for the job? I don't feel like going through the whole process of typing that. If there's nothing except for the job, what's the default for the customer? If there's nothing except for the customer, what's the default for the account? And that's how we ended up finding services. Now the payment account, really comes into play when we are, recording payments in Noify. So I can come here, record payment, send that to QuickBooks. I could see this into a QuickBooks, view in QuickBooks, and the payment account is gonna be set to that business checking that I mapped for the specific customer. Deposit to business checking. And so that's how you can see just where you get a little bit more control over how things sync between nullify and QuickBooks to make sure that your expenses and invoices end up categorized in the right place. When we get to things like job defaults, this is where we have things like, default service for time entries. So I could say, time actually, before we even get to that, generally, this goes to hours that I mentioned earlier that we can get more specific if we need. When I set up my project in plan and track, I have the option of saying services should actually go to demolition. And whatever we map on each phase of the job is going to override the, default item, for syncing time. So, if I were to now enter time for this job, for demolition, I forget which of these people I have synced with QuickBooks. I wanna say Mike is. All of these are gonna have that item tagged. So if I'm in my review time section, I could see the item that's specified as the phase here. I'll go ahead and approve these and see if Mike is in fact into QuickBooks. He's not, but I'll get to that in a bit if people need to see it. But, basically, if there's nothing specified, it goes to hours. Otherwise, it goes to the phase itself. Deposits, I usually don't get too deep into. It's very specific to people who have this feature enabled, which is in the majority of accounts. For the sake of retainage, I'm gonna look at a project that is in AIA style. I'll invoice part of this contract. And here's something that's somewhat new with Noify. So this invoice synced, and lot of the sync works just like a regular invoice where we get the catalog item at each line of the invoice. But then what we also do now is provide you with the direct link to the journal entry. So I can click here. This is the journal entry that's created. It knows to credit from the sales account, and then it will debit from retainage. And then when I invoice the retainage at the end of the project, it's going to credit the total amount that I'm invoicing and debit, the same amount from sales to balance out the books. And so that's just kind of the difference between how we're mapping these, items, how we're gonna be using our, retainage default to make sure that everything ends up in the right place in our QuickBooks account. We also have the ability to set a default class for, per jobs. But rather than setting it default, I'm gonna go to this job three thirty two and say, is a commercial job in Denver. And now when I create new transactions for three thirty two, it knows to use that, class, that location. But, in the interest in kinda speeding up this process, this is where our tags come in handy, where I can connect by notified tags commercial to commercial, Denver to Denver, to override that information without having to come back to job defaults. So what that means is I'll go to show tags, three thirty two. I want you to actually call this a residential job. I want you to actually call this a New York job. What that does is just goes back to the job's default section for me, and it updates the class and location based off the most recent information it got. So we do hear a lot of people who say, well, hey. This actually, I tagged it with residential, but I can see transactions that have the commercial on it, that don't have any class at all on it. It's all about timing. So once I tag this, that updates job defaults for new transactions moving forward. Anything that's synced before this, it won't make an adjustment to. So just make sure that we get those tags on the job and get all this mapping done as soon as possible. Similarly, if I now come in here and say, hey. Denver is actually New York. Anything that's tagged with Denver won't change. It's just for when I tag things moving forward is what this updates. But I do think this is a really neat way to, kinda just, make the ease of use of Notify a little bit simpler, make sure that you don't have to move around the system too much. And since I have this contract tagged now or the project tag, I really should say. I could view this in QuickBooks. I can see the location is set to New York, and the class is set to residential. Another thing I like to specify a lot when we go through these webinars is that payments are bidirectional. So before I showed you how a payment syncs from Notify to QuickBooks but if I wanna manage payments in QuickBooks, maybe I use QuickBooks payments but didn't integrate it with Notify or anything like that. Maybe we use another provider. Maybe they just handed me a check, and they went to the account, so they recorded really whatever the situation is. Once I record a payment in QuickBooks, I can click this and nullify. It'll also automatically happen. We can get that payment to come back in nullify without me having to record anything manually. So that always helps as well. The last part of the mapping that I like to show is our catalog defaults. So the idea here is that I have a default income and expense account for new items that are added. What that means is if I were to say add a new product, and I will say, insulated coffee cup because that's the first thing I saw in front of me. We sell them for fifty dollars. They cost us five dollars. Creating this product in Notify will also create it in QuickBooks. I could see it in this transactions log. Now go to my QuickBooks account. If I go to buy products and services, I will now have an item called insulated coffee cup. Maybe it will require a refresh. Maybe I spelled insulated wrong. Could be any number of things. Maybe it's just gonna take its time. But it'll basically be allowed to map out, not just the existence of the item itself, but also, sales. I sell this default income account. Purchases. I purchased this default expense account. And so we're just mapping to these fields in, QuickBooks. And, again, these are bidirectional fields. So if I change my income account here to be services, why not? Save. I'll go back to notify, run a sync, and I'll see item update from QuickBooks, and it'll give me that additional info. Item update QuickBooks, and that mapping is gonna be updated in my catalog default to services instead of my default. So, again, that's kind of the idea here is that these fields, although you could change them in Novi, they are QuickBooks fields. So making the adjustment can happen to either system, and it's going to sync up. But, again, this is also how we can get more specific in things like our expenses. So I mentioned earlier, and we showed an example of with ABC Supply, everything goes to supplies materials. But maybe when I buy two by six studs, I wanted to go to purchases instead. This is where I could say, add a new I don't use a bill just because we haven't done a bill yet with ABC Supply. And I'll add an item here. It could be for any job. Here, I could specify an item. These are two by six studs. Again, we see that nice little catalog icon to tell us, that this is connected and knows to use the default expense account for two by six studs instead of ABC Supply. If I even replicate the, same exact text without selecting the item, you see now there's no catalog icon. I'll do everything else the same. I'll submit this. Again, it's gonna send the bill to QuickBooks, and, the default payment account can come into play if we record payment in Notify. But I'll go ahead and pull this open in QuickBooks. I can see the line that had the item tagged to it, went to purchases. The one where I left it open ended went to, my default for ABC supply. Again, I can mark a bill as paid in QuickBooks. So if we use another app for payments, that is fine with nullify. This would just go back to nullify, update the bill. It was outstanding. Now it's paid. Kind of neat trick with what I just showed here. So, again, I can set up catalog items to have specific accounts where this can come in handy because a lot of people say, well, I I wanna use that account, but I actually, don't want to, use the phrasing. I can set up items for each account. And so what that would look like is, let's say, I want something to sync to for Archie's archie's architects, I want it to sync to QuickBooks using supplies and materials. I don't wanna update the default here, and I, don't wanna call it supplies and materials. I can actually still say this is a cash expense with Archie's Architects, and I could first say select supplies and materials for however much, choose all my job, but then I could overwrite this. So I could say, miscellaneous supplies from Archie. Now you can see that icon still persists. So even though miscellaneous supplies from Archie isn't an item, it knows what we selected earlier. So, again, just to show you that again, I went to supplies materials. I selected it, and then I could say, miss Matt from Arch. Now the description will sync into QuickBooks, but the account is going to go to what I had selected initially. So this is where I where I say, I wanted to go to the supplies materials, but I still need this description because that's how it's gonna show up in my reporting. I think that's always a a pretty handy thing to know. It exists if you're, very picky and granular about your accounting. You need to make sure things go to the exact right account. The last thing I like to show as part of this session before I get to my fun little product update is that if you pull expenses from QuickBooks into Noify, in this QuickBooks mapping section, you'll be able to specify different things that you don't want to pull to, your Noify account. So things like airfare, advertising, marketing. If I work with a flow where I say, I create an expense, it's with this vendor, it goes to this project, All of this could pull it to Notify, but I want the ability to say, like, unless it's advertising and marketing, then there's no need to put it into Notify because it's not job specific, so just leave it in QuickBooks. That's what this mapping is for. I wanna make sure I have enough time for questions and show you some other stuff. So I won't go through an example. But that's the idea here that if you're ever pulling from QuickBooks into Notify and you have, more granular needs and don't want every single item to pull into Noify, you could say, like, business insurance, business licenses, loan interest, don't need to pull into Noify. Building a property rent, don't need to pull into Noify. If you have things like corporate cars that aren't for job site use, if you don't want those, you know, loan payments to show up, anything like that, you can get a little bit more specific about what is and isn't pulled into Noify to make sure that, we're not, pulling in any overly sensitive information to people who have access to Notify only or just not cluttering our account with additional detail that's, not relevant to that's not relevant to our job costing. Now I'll get to q and a in just a minute, but, the I did, promise to show you guys something around product updates, and I do think we have a neat one that came out this week that's worth sharing. We now have the ability, speaking of kind of, catalog items. If I'm entering something let let's use a bill as an example. I just received a bill from ABC Supply, and it's for I should use the vendor with less things here, but I just received a bill for two AWG wire. We pull in the default price. We usually pay three dollars per foot of wire. But if they just sent me a bill for five hundred feet of wire and they said the wire is actually gonna be three dollars and fifty cents, this little icon that pops up is basically saying, hey. Know if I noticed that the default price for wire is not three hundred or default cost for wire is not three hundred and fifth three dollars and fifty cents, but that's what you're entering it as. Would you like to update the cost of this item in your catalog? Like I said, like, yeah. That's actually great because this is what, they're gonna start charging us moving forward. That's beautiful. I could submit this bill if I want. I don't really have to. So now if I go back to my catalog or, you know, even without even looking at the catalog, let's say I'm buying wire again in the future, it knows to set the unit cost to three dollars and fifty cents moving forward until we adjust it. Same idea with purchases. So let's say I'm buying it, and I go back to three dollars. Boom. Update cost and catalog, and this is now up to date for new transactions moving forward. We offered this previously in budgeting, but just because the receipts and bills you receive probably have the most up to date information, I think this is a great place where you could just make quick changes to your catalog without having to, completely, leave your bill purchase, wherever it is, and go to the catalog to adjust and then come back, things like that. So kind of a little, quality of life improvement that, hopefully can, save a lot of you guys some, time and effort when using your Novi account. Now I'm gonna pull up my q and a. Saw some things come in. How do I get items to go to the inventory product, item not, under a category? Good question. So if that's something you're interested in, for anyone who's, not familiar with what, they're referencing, when you log a expense in Noify or a bill. They have two options, category details and item details. Item details works like an invoice where instead of picking something from the chart of account, I choose from our set of products and services instead. By default, Novi always goes to category details. However, if you'd like to sync to item details, call it a hidden feature just because most people don't want it, but you can reach out to our support team, and we could set this up for you. We just need to know what you want the default to be for your products and services. Because the same way that we work with mapping our default expense account When nothing else is specified, we do need to know which item you want to go there. So, again, not the most commonly used thing, but if it is something that you need, definitely reach out to our support team, we could set it up for you. Question about can I receive payment in QuickBooks, have a link to nullify? Yes. Absolutely. I think I covered that probably just after you asked the question. So, essentially, if you receive a payment in nullify or QuickBooks, it syncs to the other system. So either way, that works. It's just kind of a matter of preference on your end. I had another question just vanish on me. I can go reference that in a bit if we need. When giving a rebate through Mass Save, what's the best way to record the Mass Save payment to us along with the customer's payment on the same invoice? Interesting. So I think if you're in a situation where you have, a co paid invoice or something along those lines or it's paid and then credited via some kind of subsidy or rebate, I think it's best to manage the payments in QuickBooks because they're gonna have much more technical accounting tools to provide you with the ability to record a payment that isn't straightforward. Client handed me check. And as long as the, invoice shows as paid in QuickBooks, it should still close out and notify. So even if the payment isn't all from one person, it should still all work the same on our end. I have a feeling the way QuickBooks is gonna make you do that is basically record as if the customer paid the entire balance of it. But, and then there's gonna be a credit applied, from Mass Save as a separate transaction. To be honest, an account is gonna be much better with that one than I am. I just wanna make sure that we can get through the, mapping between Noify and QuickBooks. But, again, if you can make it look closed and, correct in QuickBooks, that'll look great in Noify as well. When attaching an invoice, will it prefill with best guesses versus manually entering the details? I have a feeling this is about the auto fill, the OCR. When you are adding a bill and this is relatively new feature that could have also been part of our product updates. Let me find a less used vendor here. So if I'm entering a bill, I actually can upload a receipt. And what it's gonna do is, read the bill to the best of its ability, and fill in our different lines here so I can then job cost accordingly. It'll also match to catalog items where it sees a match to the best of its ability. So if it does see something, it'll, connect to your catalog for how it suits with QuickBooks. And if you are logging a bill against the purchase order, it also will prompt you, hey. What purchase order line is the is this bill line for just to try to help out there as well. And then the follow-up was if I did I miss where to have a default override for a vendor? Yeah. Absolutely. We'll just go to that again. Kind of the earlier part of the webinar, in my expenses defaults, I can say where the, what the default account is per each vendor. And then if we need to have something like ABC supply but not supplies materials, that's where the catalog defaults comes into play where I can say, it needs to go to purchases when I buy two by six studs even if it is with the, ABC supply. So do you typically use QBO for tax purge purposes and nullify reporting? Good question. So for tax purposes, absolutely, QuickBooks is gonna be the best tool to use here as opposed to trying to run your taxes through nullify since we don't have a module for that. Reporting, it's specific to what you're trying to get the reporting on. I always say, if your question is about jobs, nullify is gonna give you the best reports on that. So if it's, hey. How profitable was I on this job? Or did I come in over under budget on this job? Or how much have I invoiced on this job? That's where nullify is gonna really have the power to provide you with reporting. If it's company wide, hey. How did we perform overall profitability as a company in quarter one of twenty twenty five? That's gonna be probably something you can run a little bit more easily in QuickBooks because they're gonna have things like your business expenses that are job specific, and you're probably gonna want those for some of that porting. The follow-up was job costing WIP. It's if it's a job, if it's WIP, that's where nullify comes into play. Our last webinar topic was actually on reporting. I highly recommend you check out that older recording, if you wanna learn more about, running reports and work in progress in nullify. And then there was a question about web schedule and prevailing wage. We do have, again, webinars that are specific on web reporting, and on prevailing wage. Definitely check those out. There's some of our more recent topics. I think it's probably enough of a conversation that could be a deep enough dive that I don't wanna go down that rabbit hole today. But that is the last of our questions. I hope that this was a helpful session for you. If you have anything else that comes up, if there was something that I didn't cover that you wanna get more detail on, just let us know. You can reach out to your success manager. You can, reach out to support. Or if you have my email, reach out to me directly. I'm happy to do whatever I can to help out. Thanks, everyone, again. I hope you have a great rest of your day. Take care.